

When we were kids, my mom used to press autumn leaves for us to hang in the window. We would collect the leaves and then she would use the iron to press the leaves between two pieces of wax paper. But I have a confession to make. Now that I'm a mom, I don't iron. I don't even know how. There, I said it. I mean, don't get me wrong, if I really need to use the thing, I can figure it out (I've used it for plenty of craft projects, after all). But if you handed me a fancy tablecloth and said, 'Can you get the wrinkles out of this for me?' I'd sheepishly answer, 'maybe?' Yep, it's true, laugh if you must. Anyway, I know an easier way to press leaves that doesn't require an iron at all.

So anyway, I recently saw an easy way to press leaves in Family Fun magazine. All you need are some leaves, clear contact paper (I got mine in Walmart in the aisle where you find dish/kitchen utensils), and a pair of scissors. The roll of contact paper was about $5.00, but it's a thick roll, so I can use it again next year, and maybe even the year after that.
What You'll Need:
-clear contact paper
-autumn leaves
-scissors
If you're not sure what contact paper is, it's the stuff you use to line drawers in your kitchen. It usually comes on a roll in different patterns, and one side of it is sticky (do you see where I'm going with this?). I found my clear contact paper in Walmart in the aisle with dish/kitchen utensils. The roll of contact paper was about $5.00, but it's a thick roll so you can reuse it each year. You can also purchase it through my Amazon affiliate link here.
Step One is to gather leaves. That's the fun part. We just grabbed a little bucket and went on a nature walk. This photo was taken before our beloved dog Milo passed away. Who knew that would be our last leaf walk together? My heart still aches for him. But that's another story.

Step Two : Once you've collected all of your leaves, sort them out on a large table. We did this outside because it was such a nice day.

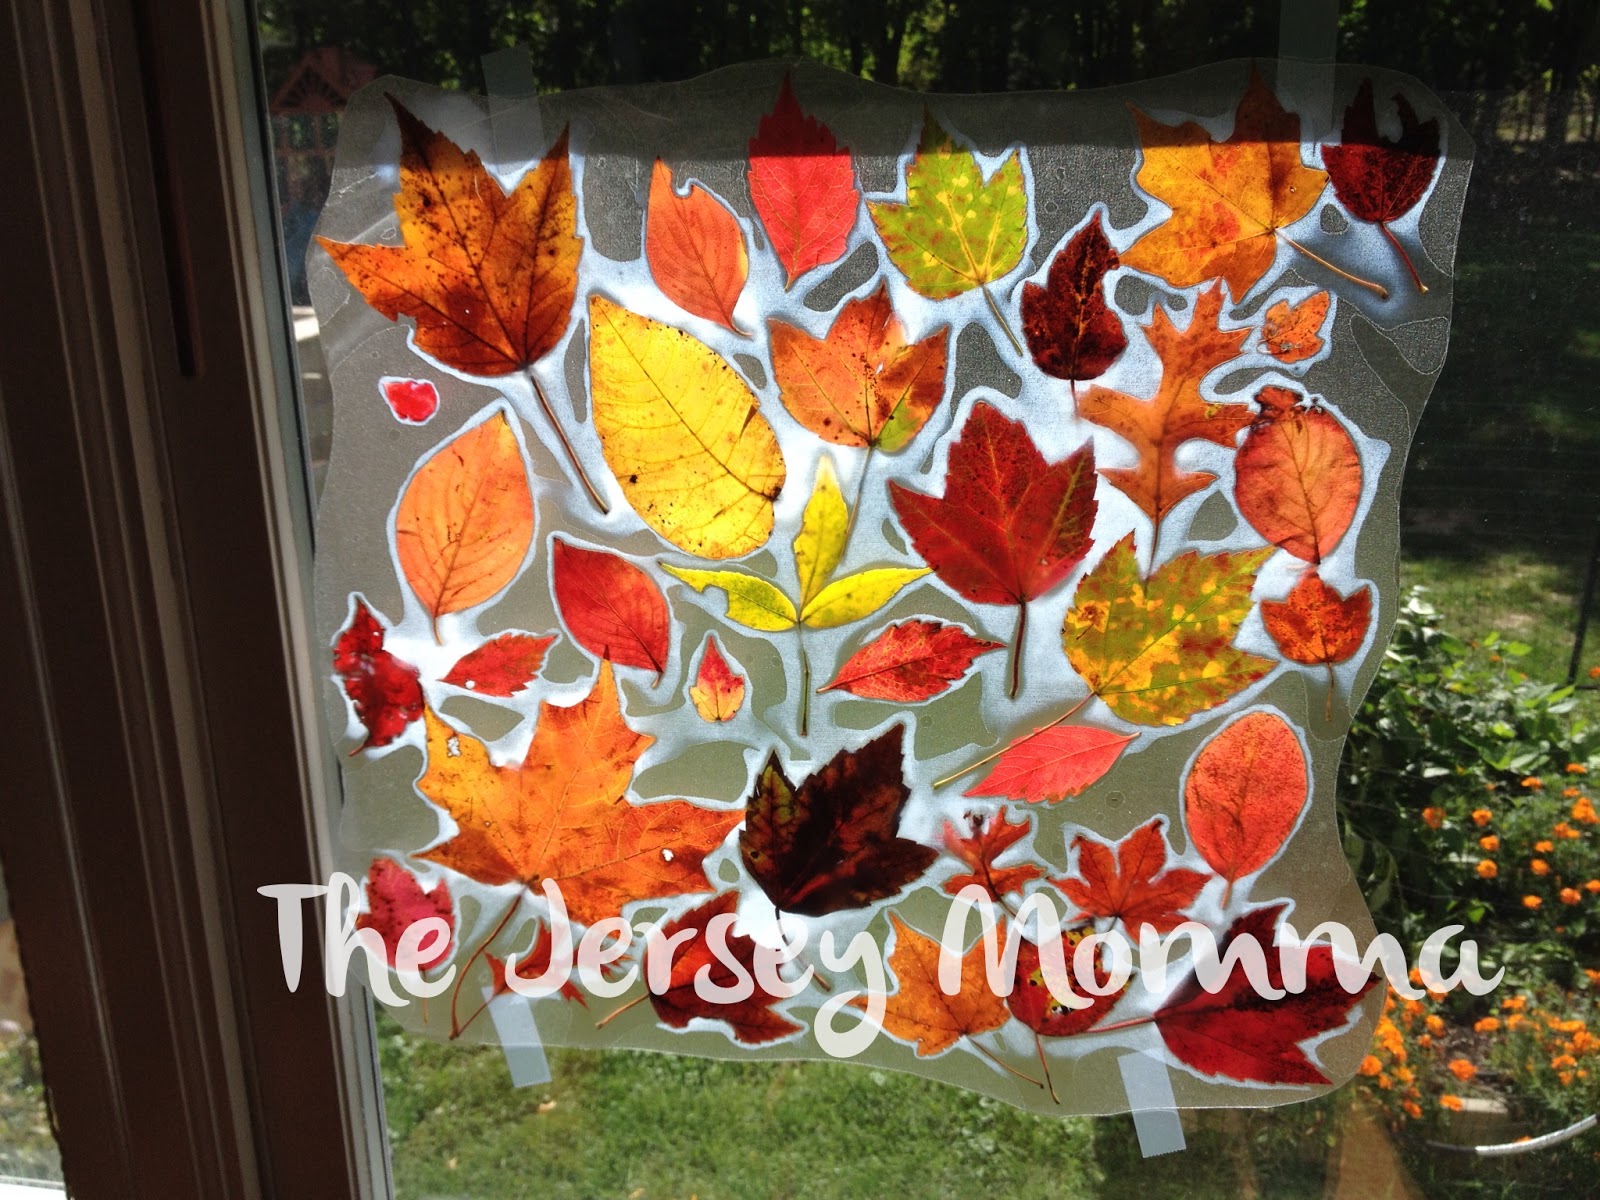
Step Three: cut your contact paper to the size you want it. Peel the contact paper off the sheet and place it sticky side up on the table. This is probably the hardest part, since it can sometimes be a pain to get the contact sheet off the paper roll. But it's not overly sticky, so don't stress too much about it. Then arrange the leaves in any pattern you want.

Step Four: cut another piece of contact paper and stick it (sticky side down) right on top of your leaf arrangement (so your leaves are "sandwiched" between the contact paper). Press firmly around each leaf (especially around the stems) and across the whole picture.
 |
| The window we hung these on has a permanent stain on it, so this was the perfect way to cover it up! Ha! |
Step Five: Then you can trim it any way you want. Hang them in a sunny window and enjoy your leaves indoors! We even mailed some to an aunt who lives in Arizona. It's a fun way to share fall leaves with people who don't normally get to see them.
 |
| We had to take leaves from THIS tree!! |
My son is an 'outside the box' thinker, and always has to do or add something to the project that more often than not, frustrates me. But then I think about what he wants to do and I say, 'eh, why not?' This time he insisted on adding little pebbles and buds to our leaf press picture. I tried to argue that those things were not flat, so it wouldn't work. But I eventually gave up arguing (as I usually do) and let him try. Lo and behold, the sticky paper was actually strong enough to hold those items, too. You can't see it in these shots, but we do actually have one leaf press picture hanging in our window now with big pebbles and tree buds in it, too.

One thing I will say in defense of my mom's old ironing method- I think the leaves lasted longer in the wax paper. Ours dried out a little quicker and the color faded a bit, but hey, at least I didn't have to use an iron!


.jpg)

Gorgeous!
ReplyDeleteLooks beautiful. We used to just press them in our books where they stayed for a long time. Thanks for the information for a new way.
ReplyDeleteLove it.
ReplyDeleteLove it. Love it.
ReplyDelete