

Even if you are not a 'Pinterest person,' I assure you that this craft is easy and fun, as well as inexpensive to make. There's nothing I dislike more than a Pinterest fail! Scroll below for my step by step instructions.

You Will Need:
-clean plastic lids from small containers (such as a butter tub lid, sour cream lid, etc)
-clear glue (I have only ever used Elmer's so I can't vouch for any other brand)
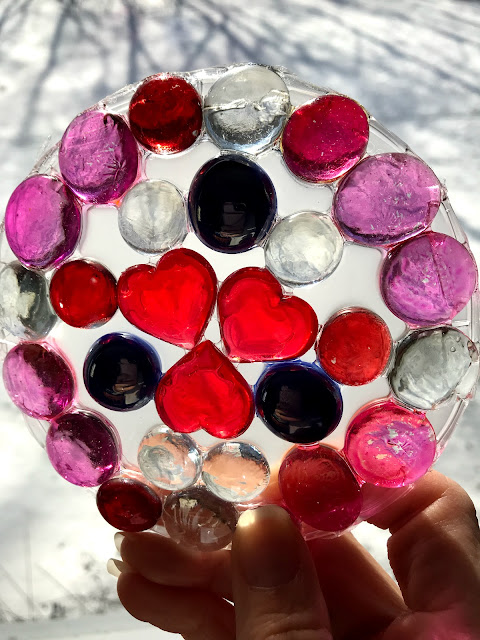
-decorative glass gems of various valentine sizes, shapes or colors (reds, pinks, purples, whites, hearts, etc)
-ribbon or clear fishing line for hanging (optional). If you're looking specifically for heart-shaped gems, you can try these from Amazon.

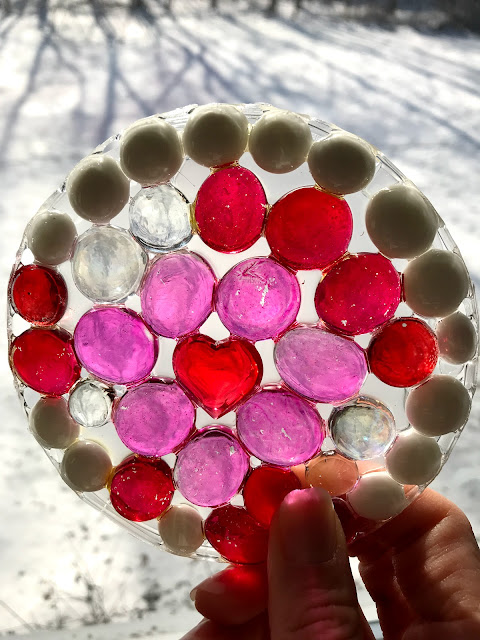
1. Lay out your design on the inside of a plastic lid. You don't have to do this, but it does help to have a general idea of where you're going to place the stones.

I'm actually not very good at making balanced patterns. If you notice the suncatcher from my first post that The Jersey Momma's Boy's art teacher made (below), you'll see that it's much better than mine! Mrs. E. has a good eye for that kind of stuff.

2. Remove your design and squirt your clear glue all over the lid. It's best to coat it as much as you can (also note that we are using the under side of the lid here).

3. Place your stones on top of the glue. It works best if you have them touch each other, not leaving too many spaces between your stones. That will make the suncatcher a little sturdier when it dries.


4. You can squirt a little extra glue around your stones after you've placed them all in, especially if you see a lot of spaces between them.

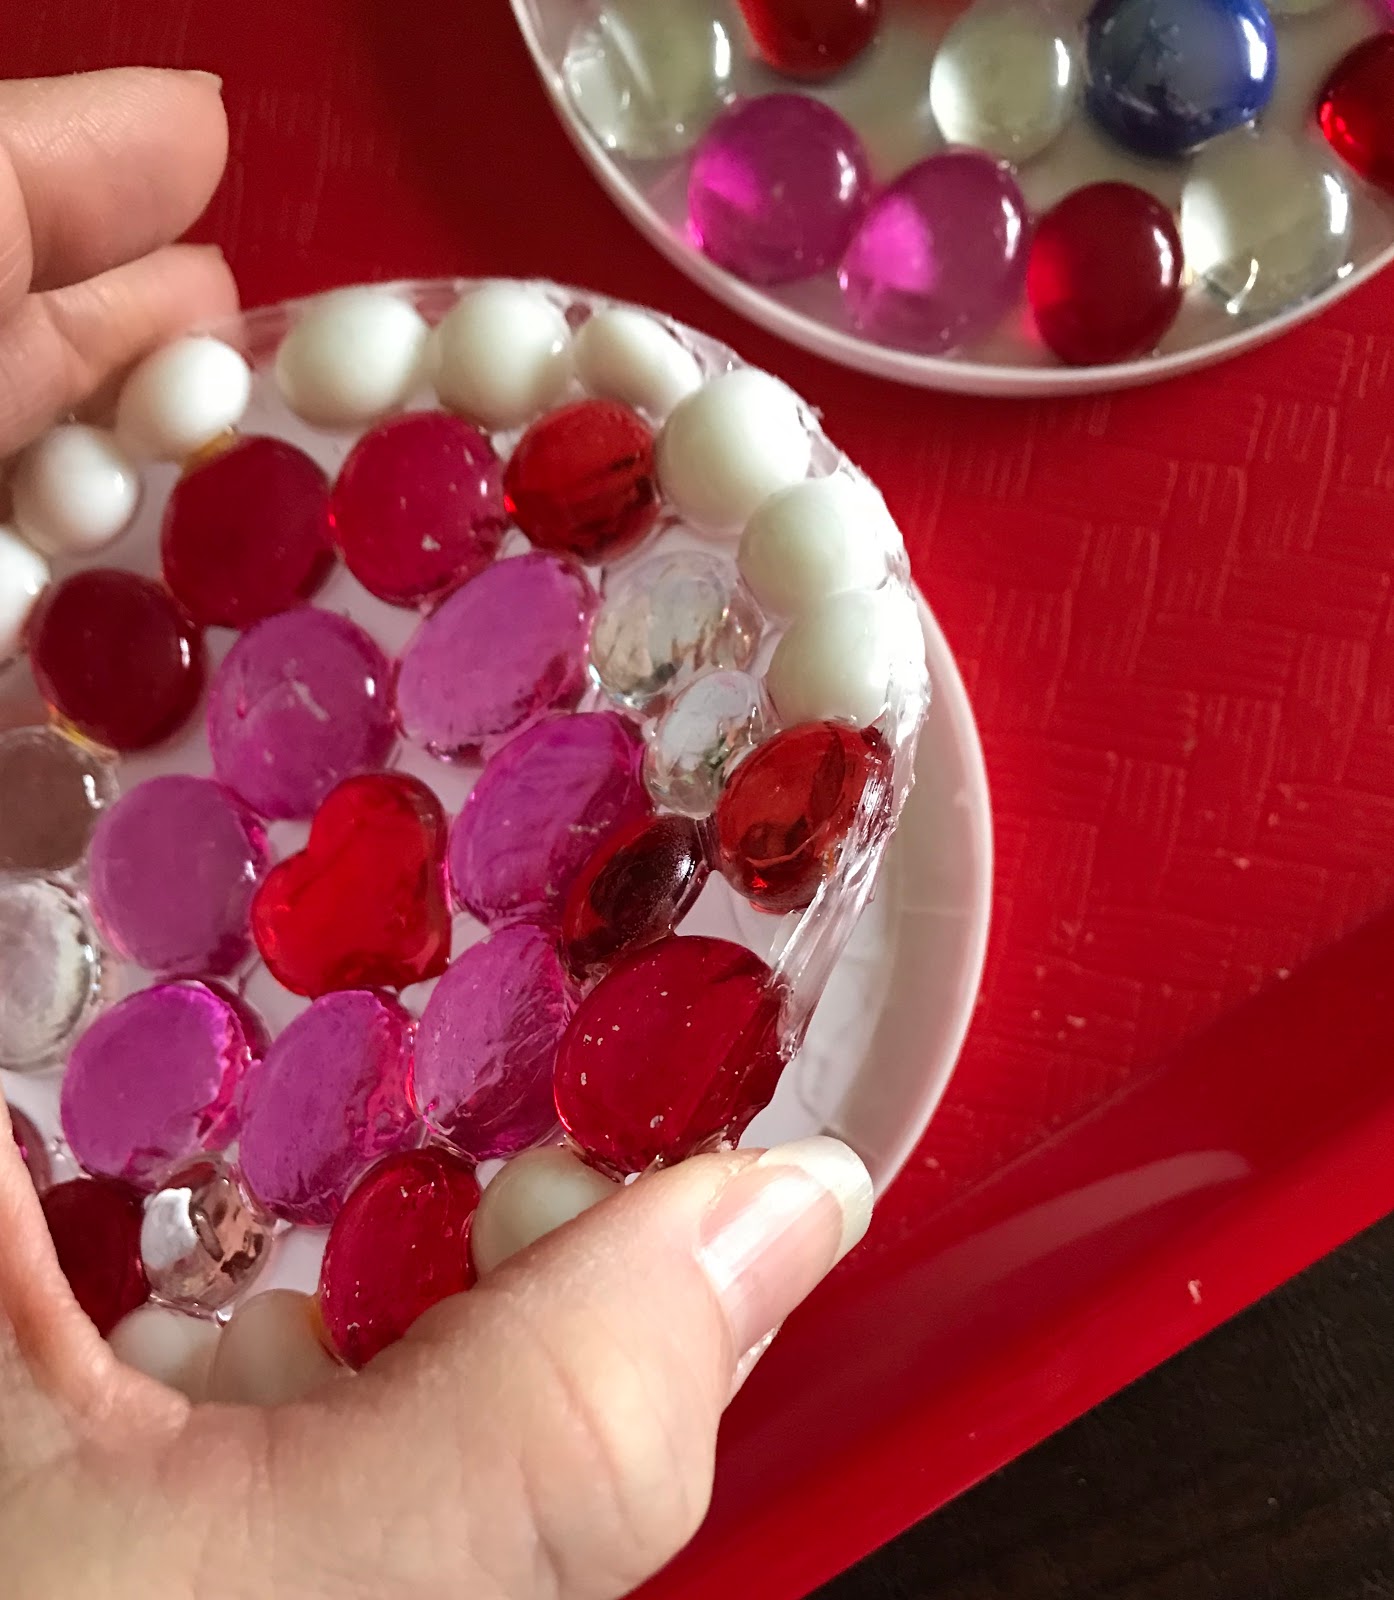
5. Let your suncatcher dry. This can take three or four days. Test it after 24 hours by peeling it slowly away from the lid. If it still seems tacky or the gems don't feel 'stuck together,' allow them to dry some more. These designs were ready after about three days (but I've had some take longer). When you peel them away from the lid, they might still be a little tacky, so let them dry glue side up after you pull them out of the lid, if needed.


The back side might look a little gnarly. That's normal. Some come out better than others. The longer you let them dry, the better they will look on the bottom. It's not really noticeable when you hang them in a window, though.

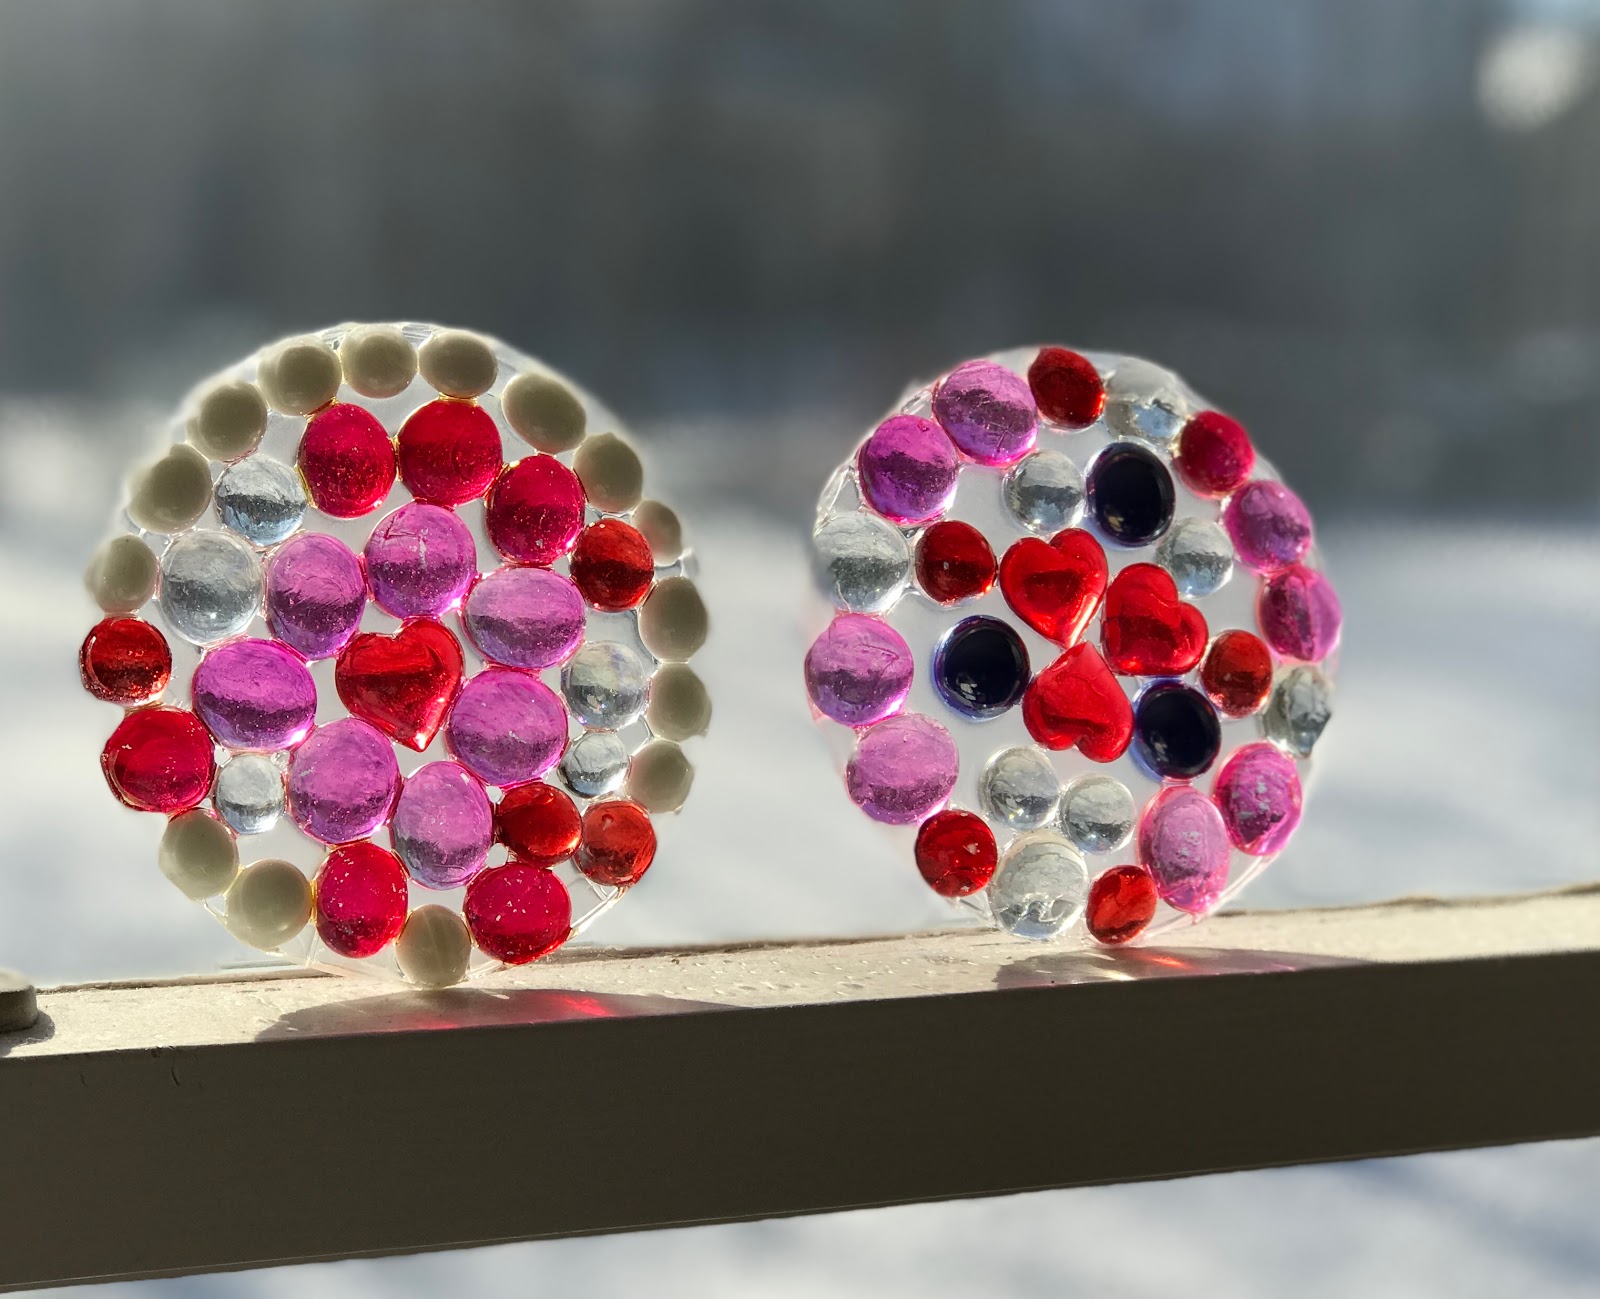
6. You can tie a ribbon through it by poking a small hole through the dried glue, or use a hot glue gun to glue the ribbon on. If there are holes between your gems you can lace fishing wire through it, too. But if your sun catcher is heavy, just be careful where you place the ribbon and be sure it can hold the weight of your suncatcher. I actually prefer not to tie ribbons on them. I like to just balance the suncatchers on the windowsill.


JERSEY MOMMA TIPS
-I had one reader comment on my Pinterest post that the glue on her suncatcher melted when she hung them in the window. I have never had this happen in all my years of making them, even in a window that receives direct sunlight all day. If you live someplace where the sun is very hot (Arizona or Florida, for example), just use your discretion about where to hang them.
-If your suncatchers curl at all, lay a heavy book on them to help them regain their shape. I haven't had too much trouble with curling, but one reader did note that in my last post, so I thought it was worth mentioning
-If you get direct sunlight in the window for many hours, the gem colors may fade over time (depending on the quality of gems used).
-These make pretty gifts for loved ones! Tie a little ribbon on them and you have a sweet, handmade item that someone can treasure for years to come!
Feel free to use my Amazon affiliate links below to find your supplies. Happy crafting!

3. Place your stones on top of the glue. It works best if you have them touch each other, not leaving too many spaces between your stones. That will make the suncatcher a little sturdier when it dries.


4. You can squirt a little extra glue around your stones after you've placed them all in, especially if you see a lot of spaces between them.

5. Let your suncatcher dry. This can take three or four days. Test it after 24 hours by peeling it slowly away from the lid. If it still seems tacky or the gems don't feel 'stuck together,' allow them to dry some more. These designs were ready after about three days (but I've had some take longer). When you peel them away from the lid, they might still be a little tacky, so let them dry glue side up after you pull them out of the lid, if needed.

The back side might look a little gnarly. That's normal. Some come out better than others. The longer you let them dry, the better they will look on the bottom. It's not really noticeable when you hang them in a window, though.

6. You can tie a ribbon through it by poking a small hole through the dried glue, or use a hot glue gun to glue the ribbon on. If there are holes between your gems you can lace fishing wire through it, too. But if your sun catcher is heavy, just be careful where you place the ribbon and be sure it can hold the weight of your suncatcher. I actually prefer not to tie ribbons on them. I like to just balance the suncatchers on the windowsill.


JERSEY MOMMA TIPS
-I had one reader comment on my Pinterest post that the glue on her suncatcher melted when she hung them in the window. I have never had this happen in all my years of making them, even in a window that receives direct sunlight all day. If you live someplace where the sun is very hot (Arizona or Florida, for example), just use your discretion about where to hang them.
-If your suncatchers curl at all, lay a heavy book on them to help them regain their shape. I haven't had too much trouble with curling, but one reader did note that in my last post, so I thought it was worth mentioning
-If you get direct sunlight in the window for many hours, the gem colors may fade over time (depending on the quality of gems used).
-These make pretty gifts for loved ones! Tie a little ribbon on them and you have a sweet, handmade item that someone can treasure for years to come!
Feel free to use my Amazon affiliate links below to find your supplies. Happy crafting!


.jpg)


Could you also use buttons?
ReplyDelete